Last year the TriCity Potters decided to ask for a group soda firing at Shadbolt Centre and we were given a slot for this April. To get prepared we invited Fredi Rahn, who teaches there and who has lots of experience with soda firing, to give us a presentation in January. She discussed which clays to use and explained that the outsides of the pots need a spray of various slips to encourage orange ‘peeling’ and ‘flashing’, and that the insides need a coat of ‘liner’ glaze because the flames and soda don’t reach down inside pots.
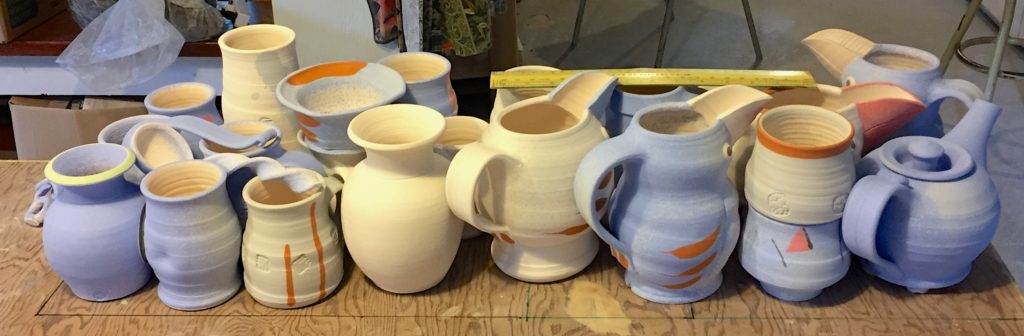
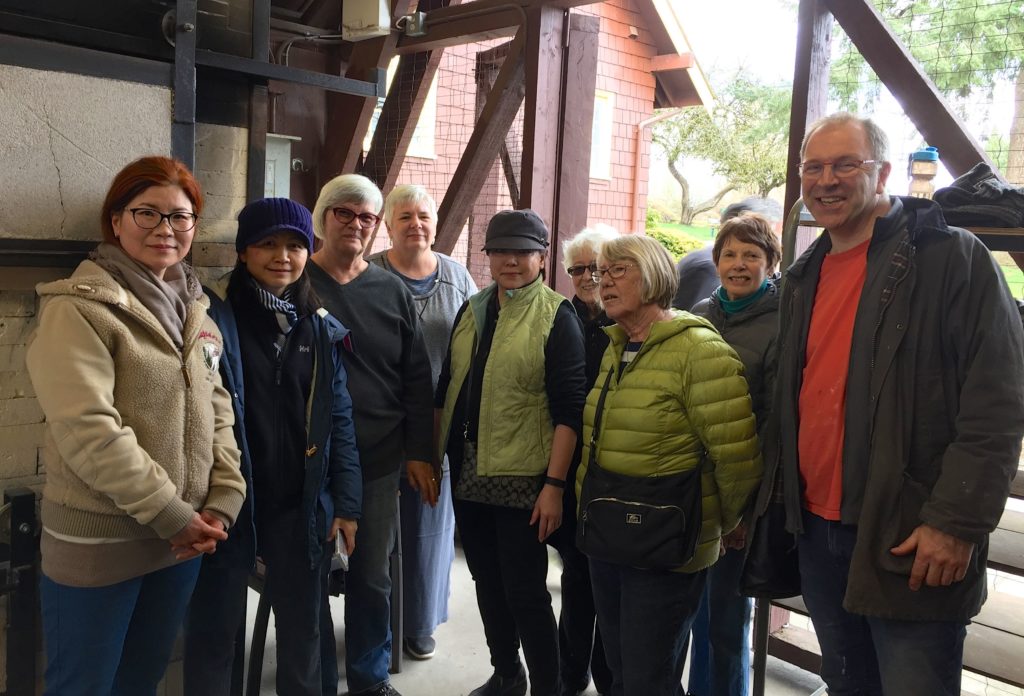
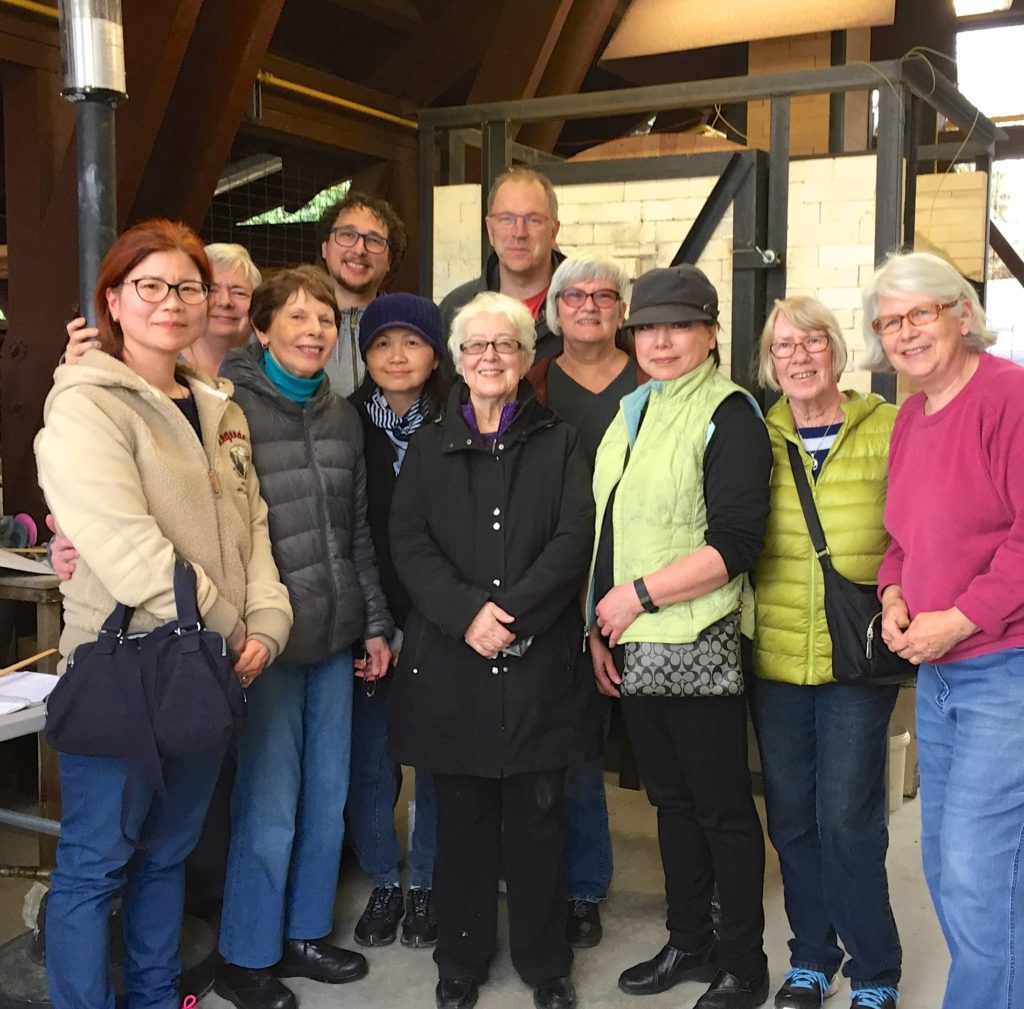
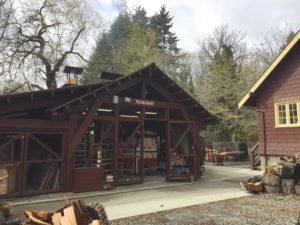
Last Wednesday we assembled at the Train Station, near the Shadbolt Centre, where there is a shed for preparing ware and a shelter for the huge wood kiln and the smaller gas-fired soda kiln. Both are newly rebuilt and very grand. The fifteen members who had reserved a spot in the kiln were each allotted 1 1/2 cubic feet of ware. It turns out I wound up with a little more and I set aside a few which were perhaps less important for this firing. I had sprayed all mine in my own studio and bisque fired them so that they are less likely to smudge in transportation. But I did take advantage of the large amount of wadding technician Jay had prepared for the group. Waddings are the little balls of refractory materials which we glue to the undersides of the pots so that they don’t get glued to the kiln shelf by the melting, soda-produced glaze.

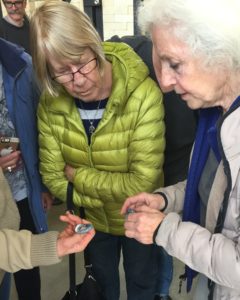
Other members, some of whom had never had a chance to fire in a soda kiln before, were given little lessons on applying the wadding, pouring liner glazes into the insides of the pots and spraying the outsides with slips by Linda Doherty. We then took our prepared pots into the kiln shed and left them on two huge racks ready for loading.
I didn’t attend the loading the next day. Linda, Jay and the other technician Tony don’t need many helpers for that painstaking job and it’s probably better not to know and worry about where your work is placed in the kiln! I was lucky enough to have all my work included.
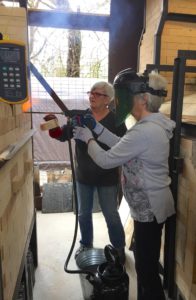
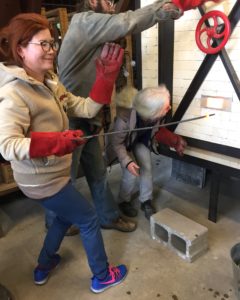
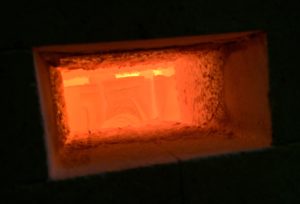
Friday afternoon was the excitement! I believe the kiln was warmed overnight and started early in the morning. We were invited to be there at 2 o’clock and right away the kiln was between cone 8 and cone 10 and it was time to start spraying the prepared soda solution. We took it in turns to be the person removing a brick or spraying the soda into the extremely hot kiln. Protective gloves are essential for both and the sprayer wears eye protection too. A couple of hours later the cones were bending, even some cone 12s and it was time to use up the contents of the sprayer. We took careful note of the information on the draw rings. At first there was just some smooth melting but no orange peel and no real shine yet. Later there was a little too much reduction and the clay was dark grey so the damper was opened to introduce more oxygen. Eventually we all agreed that there was a delicious amount of blue orange peel on the rings, we let more oxygen in for a while and then turned off the monster. So quiet… By 6pm we all headed home to wait for three full days of kiln cooling.
I’ll show photos of the Tuesday unloading and all our work in my next blog.